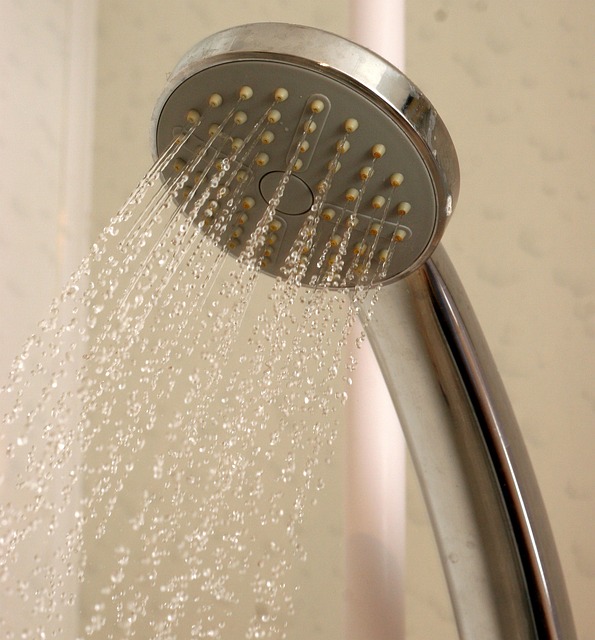
Understanding different shower head types can transform your shower into a spa-like ritual. Rainfall heads offer gentle massages, high-pressure models provide powerful rinsing, and adjustable heads allow customization. With simple tool-free installation, replacing your shower head is an easy DIY project. Choose the right type based on preference and learn How to Replace a Shower Head to enjoy a luxurious shower experience without professional costs.
“Transform your shower experience with our guide to the best shower heads of 2024. Learn how to replace an old one with a new, efficient model that suits your needs. From high-pressure rain showers to soothing massage settings, we explore various types and their benefits. This article also serves as a comprehensive step-by-step installation tutorial for DIY enthusiasts, ensuring a hassle-free switch. Plus, discover tips for selecting the ideal shower head and common mistakes to steer clear of during the replacement process.”
- Understanding Your Shower Head Options: A Guide to Different Types and Their Benefits
- Step-by-Step Installation Process: Making the Switch Easy for DIY Enthusiasts
- Tips for Choosing the Right Shower Head and Common Mistakes to Avoid During Installation
Understanding Your Shower Head Options: A Guide to Different Types and Their Benefits

When it comes to replacing your shower head, understanding your options is key. Different types offer various features and benefits designed to enhance your shower experience. For instance, rainfall shower heads mimic nature’s gentle rain, providing a soothing and full-body massage. On the other hand, high-pressure shower heads increase water flow, creating a powerful yet energy-efficient rinse. Some models feature multiple spray settings, allowing you to customize your shower from a gentle mist to a robust stream. Additionally, adjustable or flexible shower heads offer ease of use, enabling you to target specific areas for cleaning or relaxation.
While installing a new shower head might seem daunting, many modern designs come with simple, tool-free installation processes. This makes it an easy DIY project for even the most inexperienced home improvement enthusiasts. By selecting the right type based on your preferences and understanding How to Replace a Shower Head yourself, you can instantly transform your daily routine into a spa-like experience without breaking the bank.
Step-by-Step Installation Process: Making the Switch Easy for DIY Enthusiasts
Changing your shower head is an easy DIY project that can instantly transform your bathing experience. Here’s a straightforward step-by-step guide to making the switch yourself, regardless of your skill level. First, gather the necessary tools: an adjustable wrench or pliers for gripping tightly, and perhaps a new shower head of your choice. Turn off the water supply by closing the main valve under the sink or in your bathroom. This is crucial to ensure no unexpected water surges during installation. Then, unscrew the old shower head with your tool of choice. Depending on the model, you might need to twist it counterclockwise or use a wrench to loosen the connection. Once removed, clean any residual calcium buildup from the shower arm and thread. Next, insert the new shower head, ensuring its threads align perfectly with the arm’s threads. Twist it clockwise until it’s securely in place, similar to how you installed your old one. Finally, reopen the water supply and test your new shower head.
Tips for Choosing the Right Shower Head and Common Mistakes to Avoid During Installation
When it comes to choosing the right shower head, consider your personal preferences and bathroom needs. Look for factors like flow rate (measured in gallons per minute), spray patterns, material (chrome, brass, or zinc alloy), and adjustability. Higher flow rates offer a more powerful shower experience, while diverse spray patterns cater to different preferences—from gentle rain to massage-like settings. Opting for durable materials ensures longevity, especially in humid environments.
During installation, avoid common pitfalls like using the wrong tools, not turning off the water supply, or misaligning the new head. Always shut off the water before beginning, and use adjustable wrenches or pliers suitable for your shower head size. Misalignment can lead to leaks, so ensure a precise fit. Additionally, double-check connections after installation to prevent any post-fitting issues, making the process smoother and ensuring a satisfying DIY experience when replacing your shower head.
Upgrading your shower head can transform your daily routine into a luxurious experience. By understanding different types, following a simple installation process, and avoiding common mistakes, you can easily replace your old shower head and enjoy the benefits of a renewed bathroom space. Remember, with these expert tips on how to replace a shower head, DIY enthusiasts can tackle this project with confidence and create a spa-like atmosphere in their homes.